“The emphasis in ggplot2 is reducing the amount of thinking time by making it easier to go from the plot in your brain to the plot on the page.” (Wickham, 2012)
“Base graphics are good for drawing pictures; ggplot2 graphics are good for understanding the data.” (Wickham, 2012)
I’m not ggplot2’s creator, Hadley Wickham, but I do find myself in discussions trying to explain how to build graphs in ggplot2. It’s a very elegant system, but also very different from other graphing systems. Once you understand the organizing philosophy, ggplot2 becomes very easy to work with.
The grammar of ggplot2 graphics
There is a basic grammar to all graphics production. In R‘s base graphics or in Excel, you feed ranges of data to a plot as x and y elements, then manipulate colors, scale dimensions and other parts of the graph as graphical elements or options.
ggplot2’s grammar makes a clear distinction between your data and what gets displayed on the screen or page. You feed ggplot2 your data, then apply a series of mappings and transformations to create a visual representation of that data. Even with base graphics or Excel we never really plot the data itself, we only create a representation; ggplot2 makes this distinction explicit. In addition, ggplot2’s structure makes it very easy to tweak a graph to look the way you want by adding mappings.
A ggplot2 graph is built up from a few basic elements:
| 1. | Data | The raw data that you want to plot | |
| 2. | Geometries | geom_ |
The geometric shapes that will represent the data. |
| 3. | Aethetics | aes() |
Aesthetics of the geometric and statistical objects, such as color, size, shape and position. |
| 4. | Scales | scale_ |
Maps between the data and the aesthetic dimensions, such as data range to plot width or factor values to colors |
Putting it together, the code to build a ggplot2 graph looks something like:
data
+ geometry to represent the data,
+ aesthetic mappings of data to plot coordinates like position, color and size
+ scaling of ranges of the data to ranges of the aesthetics
A real example shows off how this all fits together.
library(ggplot2)
# Create some data for our example
some.data <- data.frame(timer = 1:12,
                        countdown = 12:1,
                        category = factor(letters[1:3]))
# Generate the plot
some.plot <- ggplot(data = some.data, aes(x = timer, y = countdown)) +
  geom_point(aes(colour = category)) +
  scale_x_continuous(limits = c(0, 15)) +
  scale_colour_brewer(palette = "Dark2") +
  coord_fixed(ratio=1)
# Display the plot
some.plot

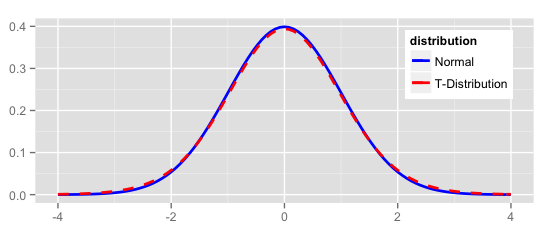
Demonstration of the key concepts in the grammar of graphics: data, geometries, aesthetic mappings and scale mappings.
Here you can see that the data is passed to ggplot(), aesthetic mappings between the data and the plot coordinates, a geometry to represent the data and a couple of scales to map between the data range and the plot ranges.
More advanced parts of the ggplot2 grammar
The above will get you a basic graph, but ggplot2 includes a few more parts of the grammar that you’ll want to be aware of as you try to visualize more complex data:
| 5. | Statistical transformations | stat_ |
Statistical summaries of the data that can be plotted, such as quantiles, fitted curves (loess, linear models, etc.), sums and so o. |
| 6. | Coordinate systems | coord_ |
The transformation used for mapping data coordinates into the plane of the data rectangle. |
| 7. | Facets | facet_ |
The arrangement of the data into a grid of plots (also known as latticing, trellising or creating small multiples). |
| 8. | Visual Themes | theme |
The overall visual defaults of a plot: background, grids, axe, default typeface, sizes, colors, etc. |
Hadley Wickham describes various pieces of this grammar in recorded presentations on Vimeo and YouTube and the online documentation to ggplot2. The most complete explanation is in his book ggplot2: Elegant Graphics for Data Analysis (Use R!) (Wickham, 2009).
References
Wickham, Hadley. ggplot2: Elegant Graphics for Data Analysis. Dordrecht, Heibelberg, London, New York: Springer, 2009. Print.
Wickham, Hadley. A Backstage Tour of ggplot2 with Hadley Wickham. 2012. Video. YouTube. Web. 21 Mar 2014. . Contributed by REvolutionAnalytics.


You must be logged in to post a comment.